01Something embarrassing I kept doing
For way longer than I'd like to admit, my deployment process was: open Hostinger file manager, navigate to the folder, delete old files, upload new ones. Sometimes I used FTP which felt marginally better but was still manual.
I knew auto-deployment was a thing. I assumed it would require setting up webhooks, configuring a CI pipeline, or something time-consuming. It doesn't. Hostinger has built-in Git integration and it takes about 10 minutes to set up.
02What you need
A Hostinger hosting account with hPanel access, a GitHub repository with your project, and basic git knowledge (committing and pushing). That's it.
One thing I'd add: make sure your repository is in a working, clean state before you connect it. The first time I did this I connected a branch I'd been experimenting on and spent 20 minutes confused about why the live site looked broken.
I also recommend making one small visible change before testing the setup. Something harmless like changing footer text. That way you know exactly what to look for after deployment.
03Step 1 — Find Git in hPanel
Log into Hostinger, open your website's hPanel dashboard, and search for "Git" in the search bar at the top. Click the Git section.
hPanel has a lot of options and it's easy to get distracted. Just search "Git" and go directly there.
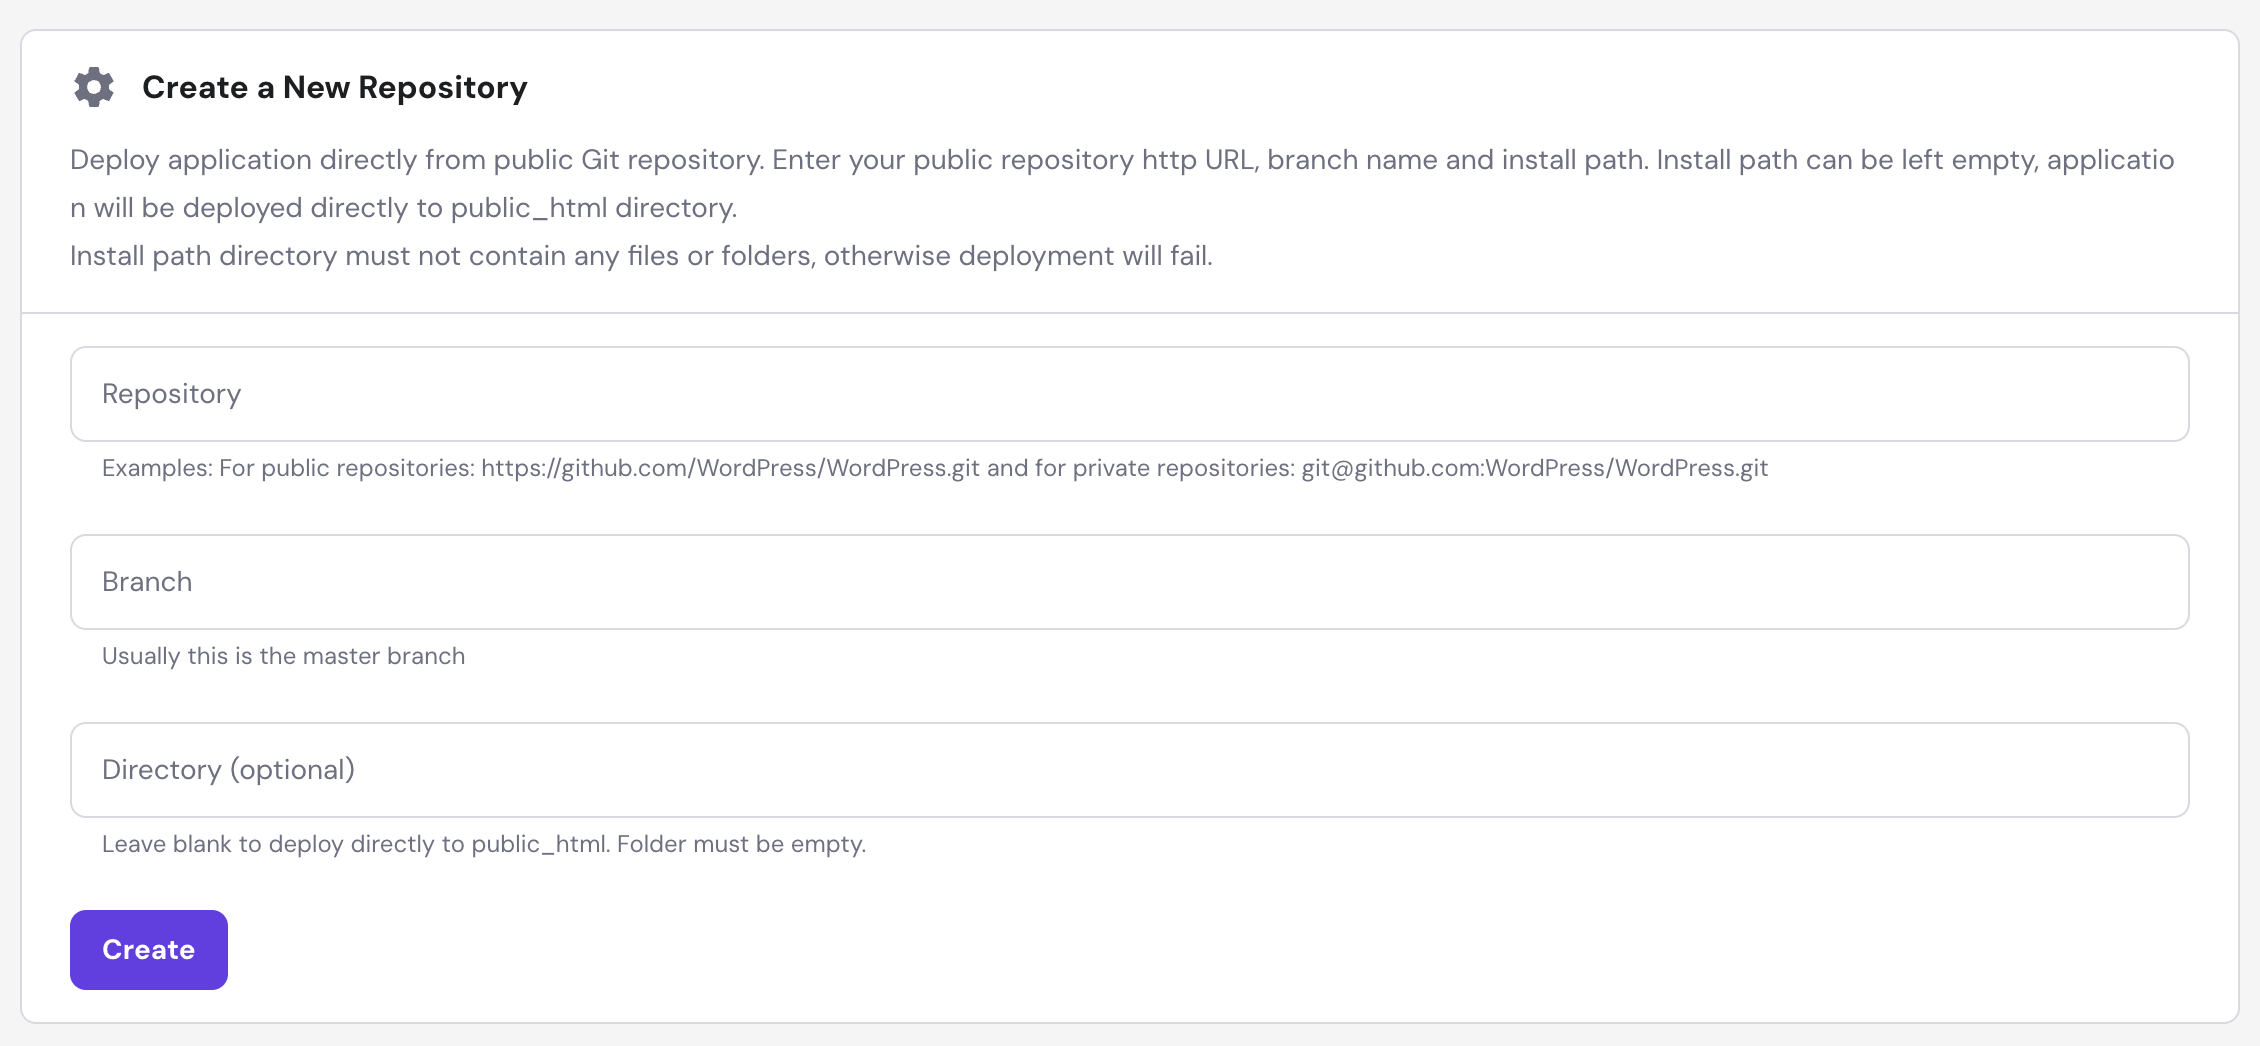
04Step 2 — Connect your repository
You'll see fields for repository URL, branch, and install path. Paste your GitHub repo URL. Set the branch to whichever branch you actually deploy from — don't assume "main" without checking.
Install path is where the files will land on your server. For most projects, root / is fine. If you deploy to a specific folder, use that. When unsure, leave it as root and adjust if something's off.
If your project has a build folder, pause here and confirm what Hostinger should serve. Static HTML projects are simple. React/Vite/Next exports need the generated output, not just source files.
05The mistake that causes most broken deploys
People connect GitHub and assume deployment means "my app will build itself correctly." Sometimes it does, sometimes it does not. Hosting panels vary, and build commands matter.
Check three things before blaming Hostinger: the branch, the build command, and the output directory. If any one of those is wrong, your site may deploy successfully and still show old or broken files.
Once those three are right, auto deployment becomes boring in the best way. Push code, wait a minute, refresh the site.
06A simple deploy checklist
Before pushing, run the build locally. Commit only the changes you mean to publish. Push to the connected branch. After deployment, open the live site in an incognito window so you are not fooled by browser cache.
If something breaks, check logs before randomly changing settings. Deployment logs usually tell you whether the pull failed, the build failed, or the wrong folder is being served.
This checklist takes two minutes and prevents most of the panic that comes from pushing directly to a live website.
07Step 3 — Enable Auto Deployment
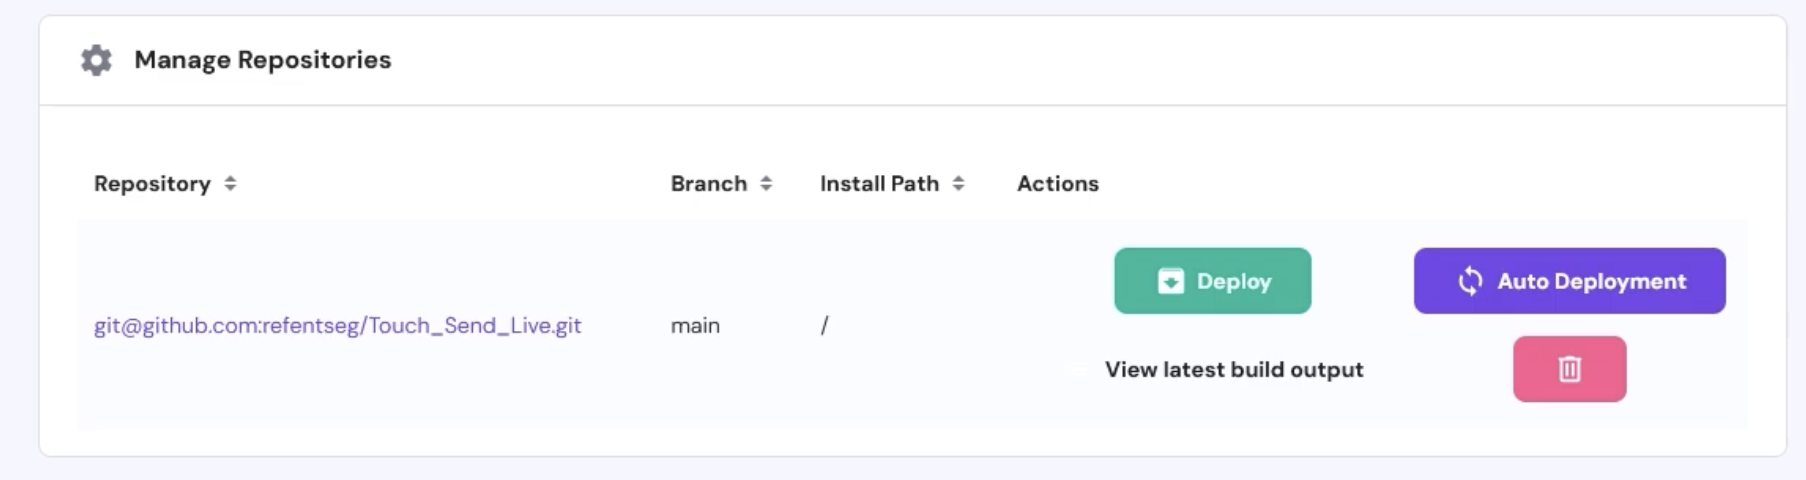
There's a toggle labelled Auto Deployment. Enable it.
This tells Hostinger to watch your connected branch. Every time you push to GitHub, Hostinger detects it and pulls the new code. No clicking, no logging in, no file manager ever again.
08Step 4 — Test it
Your deployment process is now your normal git workflow. Make a change, commit, push to the connected branch. Check the live site in a minute or two.
The first time this worked for me I made a minor CSS change and the site updated automatically. I kept refreshing expecting something to go wrong. Nothing did.
09If something looks off, check the deployment logs
Hostinger shows deployment logs showing exactly what happened when it pulled your code. If the site isn't updating or something looks wrong, start here.
The most common issues: wrong branch name (pushed to dev, connected to main), wrong build folder (your built files are in /dist but Hostinger is serving from root), or a missing dependency. The logs usually make the problem obvious.
10A couple of things I learned the hard way
Don't push to your connected branch when you're mid-experiment. If you're noodling with something locally, a push now means it's live. I broke a project's public site this way. Not fun.
If you have a build step — React, Vite, Next.js — make sure Hostinger is pointed at the output folder, not the source files. You push your source, but the built /dist folder is what actually gets served. Sort that out before wondering why changes aren't showing up.
After setting this up, use branches properly. Keep experiments away from the deploy branch, merge only when the site is ready, and your hosting workflow suddenly feels much more professional.
11My recommended branch setup
Keep one branch connected to Hostinger, usually `main` or `production`. Do not connect your everyday experiment branch. That one choice prevents most accidental live-site changes.
For small personal sites, I use a simple flow: work on a feature branch, test locally, merge into the deploy branch, then push. For client sites, I prefer a staging branch too, because the client can review changes before they touch the public site.
If you are new to Git, write the deploy branch name in your project notes. It sounds obvious, but half of deployment confusion comes from pushing to one branch while the host is watching another.
12Troubleshooting checklist
- Live site did not change: confirm you pushed to the branch connected in Hostinger.
- Site shows source files or a blank page: confirm the build output folder is correct.
- Deployment fails immediately: check whether the repository is private and whether Hostinger still has access.
- CSS or images are missing: check asset paths and whether the build is expecting a different base URL.
- Old version keeps showing: open incognito, clear cache, and check Hostinger deployment logs before changing settings.
13Quick FAQ
- Does Hostinger auto deployment replace GitHub Actions? For simple sites, yes. For complex builds, GitHub Actions can still be cleaner.
- Can I deploy a Next.js site this way? Only if you are exporting a static site or using hosting that supports the needed Node runtime. Check the output folder carefully.
- Should beginners use auto deployment? Yes, but only after they understand which branch is connected.
- What is the biggest mistake? Pushing unfinished work to the connected branch and making it live by accident.